If your space requires custom-sized furniture, especially large pieces, it can be very expensive. However, if you have basic carpentry and upholstery skills, as well as the tools and time, building your own custom furniture, such as a coffee table, can be a money-saving solution.
Method/steps
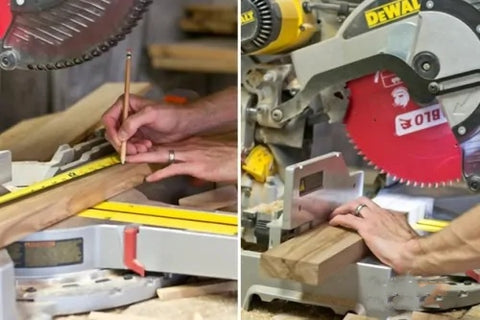
1. Using a tape measure and pencil, mark 6 16-inch sections, 4 8.5-inch sections, and 1 46.5-inch section on a 1 by 4. The 16-inch sections will be the bottom vertical legs, the 8.5-inch sections, and the long section Will be the bottom of the bottom. Then cut with a saw.
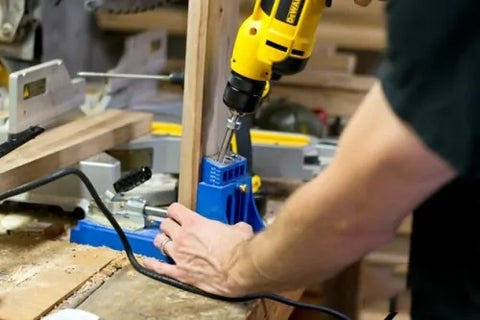
2. Using the pocket hole tool, drill two pocket holes on both ends of all 18.5-inch sections and long sections.
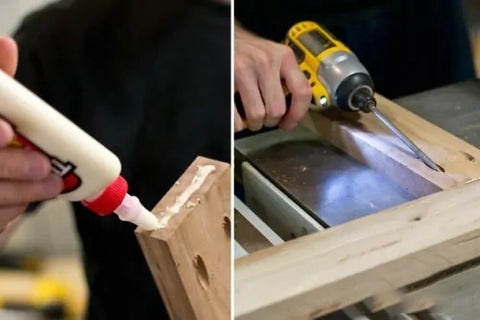
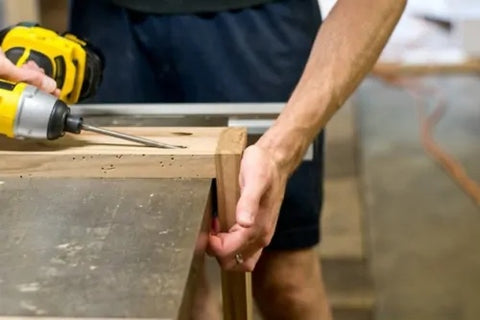
3. Place a little wood glue before attaching the legs. Assemble them with pocket screws so they can be hidden away. This will be the bottom of the base. Attach the bottom first. Attach the 18.5-inch section to the long piece as shown.
4. Then turn it over and attach the 16-inch legs to the base with pocket screws as shown in the picture. When the base is attached, sand with 220-grit sandpaper and seal with clear wax, polyurethane, or stain if necessary.
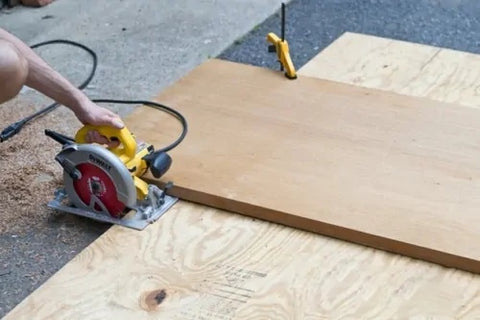
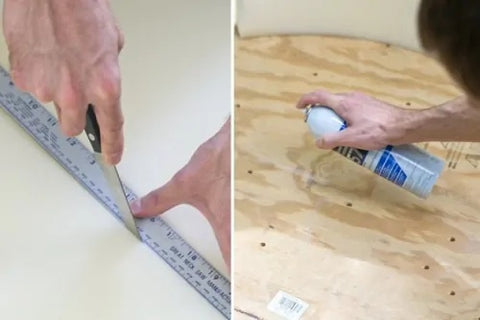
5. Most home improvement stores will have some cuts in the store for free, so take advantage of that if you can. If cutting at home, use a table saw to cut the plywood to size, 42 by 48 inches. Alternatively, use a few two-six plywood to lift the plywood off the ground, clamp the ruler in place, and use a circular saw to cut a straight line.
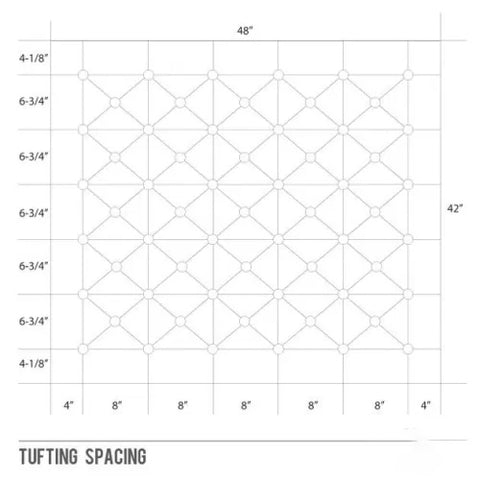
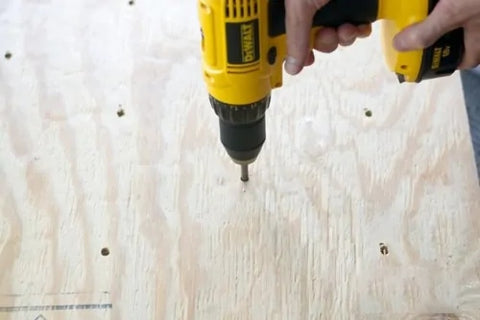
6. Follow the diagram, giving holes to prepare for tufting. Drill holes with a 1/4-inch drill bit.
7. Measure the 2 inches thick foam size. Let the foam overhang 1 inch on all sides to give a smooth edge. At the top, the foam should be 44 x 50 inches. Using a very sharp kitchen knife (it should be sharp enough to cut through in one go), cut the foam into small pieces. If your foam isn't wide enough, piece it together. Later it will cover the blow to hide any lines.
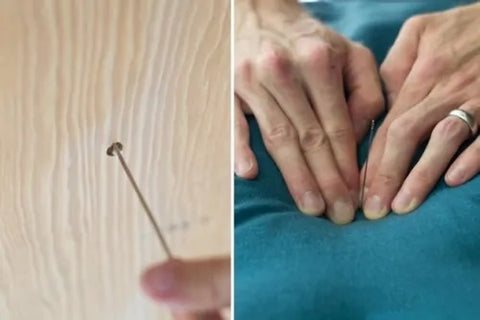
8. Cut the batten and fabric so about 8 inches overhang the top of the ottoman on each side. Place the fabric in the middle, over the foam. From below, find the hole and pierce it with a long needle. Put the needle in place.
9. If necessary, follow the button cover kit. If using a button kit from a craft store (as opposed to upholstery buttons), apply strong glue to the inside before closing the buttons to strengthen the bond. Upholstery stores will also cover buttons if you want to save a step.
10. Using the needle from the bottom as a guide, place a few tack holes in the top of the fabric as shown in the photo. This step isn't critical, but it will make pressing the button easier. Remove the guide pin from underneath and push the threaded pin through the top. It helps to have two needles, one to act as a guide and the other to thread the button. Use your fingers to push the button down firmly from above to keep it in place.
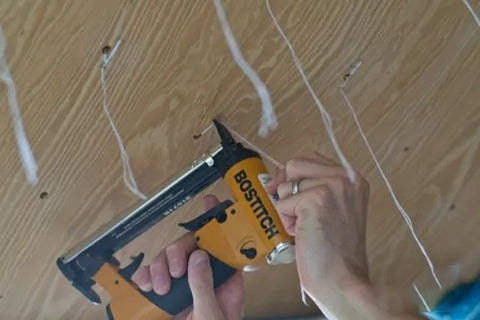
11. Pull the wire tight from below and nail the wire to the bottom of the plywood. Order three to five more times. As shown in the photo, when you staple, change the direction of one line. This will ensure that the button is secure and cannot slip. There is no need to pull after the first stapler, just continue teaching the thread and staple three to five more times.
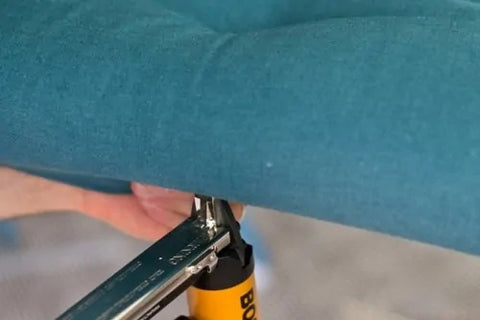
12. Straighten the fabric and pin it underneath a few inches from the edge of the ottoman. Use your palms, not your fingertips, to pull from the bottom of the fabric. This will prevent pulling and give a smoother finish. Nail about 6 inches from all corners.
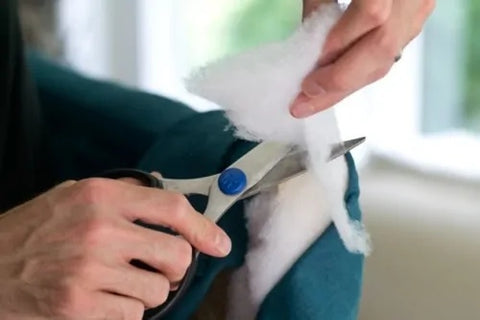
13. Remove any excess batting from the corners. This will make it easier to fold the fabric to finish smoothly.
14. At the corners, pull and secure the fabric with staples. At the other end, fold the fabric and place the stapler.
15. Attach a corner bracket to the inside edge of each leg on the base. Next, turn the ottoman top over and place the base on the bottom of the ottoman top. Attach the footrest to the other end of the angle bracket using the screws included with the angle bracket.
16. Turn your ottoman over and accessorize with your favorite trays, books, and accessories.